A single misplaced spreadsheet can change a valuation, trigger a renegotiation, or derail trust at the worst possible moment. In mergers and acquisitions, document handling is not an administrative detail. It is a core deal risk that affects speed, certainty, and outcomes.
The pressure is easy to recognize: multiple bidders, tight deadlines, and sensitive files moving between legal counsel, finance, and executives. Many deal teams worry about one specific problem: “How do we share what buyers need without exposing what they should not see?” Secure document management answers that question with clear controls, traceable activity, and a practical way to run due diligence without chaos.
The hidden cost of weak document control in due diligence
M&A due diligence concentrates an unusually broad set of information into one place, often including cap tables, IP assignments, customer contracts, HR files, and security documentation. When that content is shared through email threads, consumer file-sharing links, or uncontrolled local drives, the risk profile increases quickly.
- Accidental disclosure: wrong recipient, forwarded attachments, or overly broad shared folders.
- Stale versions: bidders reviewing outdated documents and raising avoidable questions.
- Unclear permissions: third parties accessing items beyond their scope, including highly sensitive HR or customer data.
- Limited auditability: reduced ability to prove what was shared, when it was shared, and who opened it.
These are not theoretical concerns. Widely cited industry research, such as the Verizon Data Breach Investigations Report, shows that credential abuse, social engineering, and misdirected access continue to be common pathways into sensitive systems. In an M&A context, that translates into a clear mandate: access must be tightly governed and continuously monitored.
Why virtual data rooms have become the M&A standard
Modern deal teams increasingly rely on Virtual Data Rooms for M&A Teams because they are purpose-built for high-stakes, time-sensitive information exchange. Instead of scattering files across tools that were not designed for due diligence, a virtual data room centralizes the deal repository and supports secure document sharing and access control under one set of rules.
A well-run VDR also helps teams explore the role of virtual data rooms in M&A deals, from secure document sharing and access control to due diligence workflows and buyer engagement analytics. In practice, that means your team can see what is happening in the room, not just hope that the right information has reached the right people.
Security capabilities that matter most
“Secure” is not a single feature. It is a set of controls that work together to prevent leakage while keeping legitimate collaboration moving.
- Granular permissions: restrict folders and files by role, bidder group, or individual users.
- Dynamic watermarking: discourage screenshots and unauthorized distribution by stamping viewer identity on documents.
- Audit trails: maintain a defensible log of uploads, views, downloads, and Q&A actions.
- Download controls and view-only modes: limit what can leave the room, especially for crown-jewel documents.
- Time-bound access: revoke permissions quickly when bidder status changes.
Faster deal execution comes from better workflows
Security alone does not close a deal. Process does. A virtual data room can support M&A due diligence, improve document security, streamline collaboration, and help deal teams complete transactions faster by replacing ad hoc sharing with repeatable workflows.
Here is a practical due diligence sequence many teams follow:
- Prepare and structure: build an index aligned to the deal checklist (corporate, financial, legal, IP, HR, IT/security).
- Ingest and validate: upload documents, confirm versions, and apply consistent naming and metadata.
- Set access rules: assign bidder groups, legal advisors, and internal reviewers; apply least-privilege permissions.
- Run Q&A: route questions to owners, track responses, and keep a clean record of clarifications.
- Monitor engagement: use buyer engagement analytics to understand which sections are most active and where concerns may be emerging.
- Lock down at signing: tighten access, export reports, and preserve the final audit log for compliance.
Buyer engagement analytics: insight without oversharing
When multiple bidders are involved, analytics can become a strategic advantage. Which documents are being revisited? Are bidders spending time on revenue retention data, regulatory files, or top customer contracts? That visibility helps sellers anticipate friction points and respond with targeted disclosures, without expanding access to the entire repository.
Choosing the right platform: what to compare
Different providers emphasize different strengths, from usability to advanced controls. You may encounter platforms such as Ideals, Intralinks, Datasite, or Firmex in competitive evaluations. The key is to test them against your deal’s real conditions: number of bidders, speed of Q&A, sensitivity of IP, and reporting needs.
For teams comparing options, https://datarooms-review.com/ can be a useful starting point to understand feature differences and how specific tools support due diligence workflows, access governance, and collaboration patterns.
Compliance and accountability are now board-level topics
Security expectations around disclosures and governance have risen across the market. For public companies, cybersecurity transparency is increasingly formalized. The SEC’s 2023 cybersecurity disclosure rule underscores that incident reporting and risk oversight are no longer optional conversations. During M&A, that makes documentation discipline even more important, because diligence often includes security posture reviews, incident history, and third-party risk records.
What secure document management ultimately protects
Secure document management protects more than files. It protects bargaining power, timelines, and credibility. If a buyer questions data integrity, sees inconsistent versions, or suspects leakage, the deal can slow down or reprice.
The good news is that the tools and practices are mature. By using a virtual data room with strong access control, clear due diligence workflows, and engagement analytics, deal teams can share confidently, collaborate efficiently, and keep momentum through signing and closing.
In regulated transactions, the biggest exposure often comes from the simplest action: sharing the wrong file with the wrong person at the wrong time. Across Southeast Asia’s fast-moving deal landscape, compliance teams and deal leaders face a hard reality. Due diligence requires speed and transparency, but regulators and stakeholders expect provable control, confidentiality, and accountability.
This topic matters because compliance risk is rarely limited to fines or enforcement. A single uncontrolled disclosure can trigger contractual breaches, derail negotiations, and create long-term reputational damage with customers, partners, and investors. If you are preparing for an acquisition, fundraising round, audit, or major procurement, you may be asking: how do we collaborate with external parties without losing governance over sensitive information?
A virtual data room (VDR) is designed for exactly this scenario. When implemented well, it transforms ad-hoc file sharing into an auditable, policy-driven process. This article explains how organizations in Southeast Asia can reduce compliance risk by adopting a modern VDR workflow, with an emphasis on practical controls, regional regulatory realities, and vendor selection criteria.
Why compliance risk is uniquely challenging in Southeast Asia
Southeast Asia is a high-growth region with active cross-border trade and investment flows. That growth brings complex compliance obligations because organizations frequently exchange personal data, financial documents, IP, and customer contracts across multiple jurisdictions and industries. While local rules differ, common themes include consent and purpose limitation for personal data, security safeguards, breach readiness, third-party risk management, and restrictions or conditions on cross-border transfers.
Many compliance failures happen during “high-pressure sharing” moments: due diligence requests come in late, multiple versions of documents circulate, and teams use email threads or consumer file-sharing tools without consistent controls. The result is a weak evidence trail, inconsistent access decisions, and unclear accountability.
In Singapore, for example, organizations are expected to protect personal data with reasonable security arrangements under the PDPA, and regulators can request documentation showing how the organization managed access and safeguards.
Where a VDR reduces compliance risk in real projects
A VDR is not just “online storage.” In compliance terms, it is a controlled environment for disclosure, with identity-based access, granular authorization, monitoring, and evidence. These capabilities map directly to typical control requirements in regulated deals and audits.
1) Strong access control and least privilege
Compliance risk rises sharply when access is “all or nothing.” A VDR allows administrators to apply least-privilege access at the folder, subfolder, and document level, limiting who can view, download, print, or share. Many solutions also support time-based access windows, IP restrictions, and MFA policies.
Practical examples of least privilege in a transaction include restricting HR folders to a small “people diligence” subgroup, limiting customer lists to view-only mode, or allowing legal counsel to access contract templates without enabling downloads.
2) Audit trails that stand up to scrutiny
In a compliance investigation, you often need to answer basic questions with evidence: Who accessed the document? When did they access it? Did they download it? Did they share it internally? A VDR’s activity logging can provide this evidentiary trail without relying on user recollection or scattered email records.
Audit trails also reduce operational risk during negotiations. If a counterparty disputes what was disclosed or when it was disclosed, you can point to the log history, version timestamps, and permissions states at the time of access.
3) Encryption, secure viewing, and controlled export
Modern VDRs protect data in transit and at rest, and many provide secure viewing modes to reduce uncontrolled distribution. Download restrictions, dynamic watermarking, and “view-only” settings help keep sensitive materials from being copied into uncontrolled environments. For especially sensitive documents, redaction and partial disclosure can keep non-essential identifiers out of scope while still enabling diligence progress.
4) Q&A workflows that reduce off-platform leakage
One underappreciated compliance benefit is a structured Q&A module. Instead of answering diligence questions in email or chat, teams can manage questions, assign owners, maintain an approval chain, and publish responses within a governed system. This reduces the chance that confidential details are inadvertently forwarded, misquoted, or provided without proper review.
5) Faster, cleaner evidence for audits and internal governance
For internal audit and risk teams, a VDR can become a repeatable mechanism for controlled disclosure: a consistent folder structure, standardized permission templates, retention rules, and a uniform evidence log. This is especially valuable when you run recurring processes such as annual audits, vendor assessments, or compliance attestations.
Compliance controls and the VDR features that support them
| Compliance risk | Typical control expectation | VDR feature that helps | Evidence you can export |
|---|---|---|---|
| Unauthorized disclosure | Least privilege, need-to-know | Granular permissions, role-based access, MFA | Permission matrix, user list, access history |
| Untracked sharing | Traceability and accountability | Audit logs, secure links, session controls | Activity report by user/document |
| Data exfiltration | Safeguards against copying/export | View-only mode, download/print controls, watermarking | Download events, watermark policy settings |
| Disclosure of unnecessary personal data | Data minimization | Redaction tools, segmented folder access | Redaction logs, version history |
| Regulatory and audit readiness gaps | Documented controls and records | Reporting dashboard, retention governance, structured Q&A | Audit trail export, Q&A transcript |
Choosing a secure data room for Southeast Asia
The best VDR for compliance is the one that matches your risk profile and produces defensible evidence with minimal friction for deal teams. In practice, a secure data room should be evaluated as part security control, part process tool, and part compliance record system.
To benchmark options locally, many teams start by reviewing Virtual Data Room Providers in Singapore, since Singapore is often used as a regional hub for multinational transactions and regulated industries. At a practical level, you want vendor capabilities that make cross-border collaboration safer while still meeting internal governance requirements.
Key capabilities to prioritize in a regulated environment
- Identity and access management: SSO options, MFA enforcement, granular roles, easy offboarding, and clear admin separation of duties.
- Granular permissions: View-only, no-download, no-print, time-limited access, and per-document controls.
- Audit and reporting: Exportable logs, configurable report cadence, and filtering by user, document, time range, and activity type.
- Information protection: Watermarking, screenshot deterrence (where supported), and document-level security policies.
- Redaction and versioning: Controlled updates, clear version history, and reproducible redaction workflows.
- Q&A management: Assignment, internal review, escalation, and a full record of published responses.
- Retention and lifecycle management: Archiving, retention windows, and clean project closeout with evidence preservation.
Software ecosystem fit (what to integrate and why)
A VDR rarely stands alone. For compliance risk reduction, integration decisions matter because they determine where data flows and whether you can maintain consistent controls. Common considerations include:
- Identity providers: Microsoft Entra ID (Azure AD) or Okta for centralized access policies and offboarding.
- eSignature: DocuSign or Adobe Acrobat Sign for governed execution of transaction documents.
- Information governance: Microsoft Purview for classification and retention policies, where it fits your organization’s architecture.
- Productivity and collaboration: Microsoft 365 or Google Workspace, with clear rules about what belongs in the VDR versus general collaboration drives.
Some deal teams also standardize around a recognized VDR product for repeatability. If you mention specific platforms in internal documentation, ensure naming consistency and vendor-approved security documentation. For example, if your organization evaluates Ideals, document how its permissioning, audit trails, and disclosure workflows map to your internal controls.
A compliant VDR workflow you can operationalize
Tools reduce risk only when paired with a disciplined workflow. The following sequence is a strong baseline for most transactions, vendor assessments, and regulated disclosures.
- Classify your data and define “disclosure tiers”: Decide which folders contain personal data, trade secrets, regulated financial information, or export-controlled material, and assign tiers accordingly.
- Create a standardized folder structure: Use a consistent index across deals so reviewers can find documents without ad-hoc sharing. Standardization also helps audits.
- Set role templates before inviting users: Build roles such as “Bidder View-Only,” “Legal Counsel,” “Financial Advisors,” and “Internal Admin.” Apply least privilege by default.
- Enforce MFA and review identity hygiene: Require strong authentication for external users and confirm each user’s organizational affiliation.
- Publish a disclosure protocol: Define which documents require legal/compliance sign-off, how redactions are handled, and who can answer Q&A.
- Use Q&A inside the VDR: Route requests through assignment and approval steps, then publish answers in a controlled way.
- Run periodic access reviews: Validate who still needs access, remove dormant accounts, and tighten permissions as the process evolves.
- Close out with evidence: Export audit logs, permission snapshots, and a final document index. Archive the room per your retention policy.
Cross-border data transfers and data residency: practical risk reduction
Many Southeast Asian transactions involve parties in multiple countries, external advisors in different time zones, and cloud services that may store or process data in various regions. Compliance teams therefore need a clear view of where sensitive information resides, who can access it, and how cross-border disclosures are governed.
A secure data room helps because it centralizes disclosure and provides a single control plane for access, monitoring, and revocation. However, you still need to confirm vendor commitments on hosting locations, subcontractors, and operational access. For regulated industries, it is also prudent to document the legal basis and contractual controls for cross-border transfers, including vendor clauses and confidentiality obligations.
Questions to ask your VDR vendor about regional operations
- Where will our data be hosted, and can we select a region?
- Who has administrative access on the vendor side, and how is it controlled and logged?
- What subcontractors are used for hosting, support, or analytics?
- How do you support customer-controlled encryption keys, if available?
- What is your incident response process, and what notification commitments are in the contract?
- Can we export full audit trails and permission histories at any time?
Sector-specific considerations in Southeast Asia
Financial services and fintech
In banking, payments, and capital markets, diligence often includes sensitive customer information, model documentation, and security reports. A VDR should support strict view-only modes, controlled downloads, and rapid access revocation. Consider adding “clean team” workflows for competitively sensitive information, and segment access for external advisors versus bidders.
Healthcare and life sciences
Healthcare data may include patient-related information, clinical documentation, and vendor records. Minimization and redaction are critical. Where possible, share aggregated or de-identified materials and restrict access to the smallest feasible group. Use Q&A controls to prevent accidental disclosure of identifiable details in written responses.
Telecoms, platforms, and high-volume consumer businesses
These deals often involve large datasets, security architecture materials, and third-party processor relationships. Compliance risk concentrates around data processing agreements, breach response evidence, and access governance. Ensure your VDR makes it easy to provide a coherent “security and privacy pack” with version control and auditability.
Common pitfalls that still create compliance exposure
Even with a strong VDR, several missteps can reintroduce risk. Address these early to avoid “tool theater,” where you have the software but not the discipline.
- Over-permissioning for convenience: Granting broad access to save time undermines least privilege and can be hard to unwind later.
- Allowing uncontrolled exports by default: Downloads and printing should be explicitly justified, not the baseline setting.
- Splitting the record across tools: If Q&A happens in email but documents live in the VDR, your evidentiary trail is incomplete.
- Neglecting offboarding: Advisors, consultants, and former bidders should be removed promptly, with access logs retained.
- Unclear ownership: A VDR needs an accountable owner (often legal, compliance, or a deal PMO) with clear escalation paths.
Implementation tips that make compliance “stick”
To make your VDR program sustainable, treat it like a control system, not a one-off deal folder. Build repeatability into templates, training, and governance, and keep the process simple enough that deal teams do not bypass it.
Establish minimal, enforceable standards
Define a baseline configuration for every room: MFA enabled, watermarks on, downloads restricted unless approved, and audit logging set to the highest available detail. If exceptions are required, document them with a rationale and an approval record.
Use playbooks and pre-built indices
Create a standard due diligence index aligned to your industry and transaction type, then add or remove modules as needed. This reduces last-minute scrambling, improves completeness, and supports consistent disclosure decisions.
Run a “pre-flight” compliance check
Before you invite external parties, validate that your permission groups, redaction status, and folder structure match the disclosure protocol. Consider a short internal review by legal or compliance to confirm that sensitive data is segmented and minimization steps have been applied.
Measure what matters
Instead of focusing only on speed, track indicators that reflect risk reduction: number of permission exceptions granted, frequency of access review, percentage of documents shared as view-only, and time to revoke access when a party exits the process. These metrics can be reviewed post-deal to improve your next implementation.
Conclusion: better disclosure control is measurable risk reduction
Reducing compliance risk in Southeast Asia is not about slowing deals down. It is about making disclosure defensible: controlled access, clear approvals, consistent evidence, and a structured way to handle questions and updates. A secure data room supports these outcomes by turning sensitive sharing into an auditable workflow rather than a scattered set of emails and links.
When you combine strong VDR features with disciplined governance, you gain more than confidentiality. You gain a repeatable compliance posture that scales across transactions, audits, and cross-border collaborations, while giving regulators and stakeholders something every organization needs: proof.
M&A transactions depend on clarity, accuracy, and trust—yet historically, due diligence has been one of the most fragmented stages of the entire deal process. Disconnected files, unsecured email exchanges, and inconsistent access control often leave both buyers and sellers vulnerable to mistakes, delays, and compliance risks. Today, the M&A virtual data room has become the new standard for ensuring transparency. By centralizing sensitive documentation in a secure, structured environment, it enables every party to evaluate the deal based on verified data, traceable activity, and real-time collaboration.
Why transparency has become non-negotiable in modern M&A
The M&A landscape has evolved dramatically. Regulatory pressures have intensified, transactions have become more global, and deal cycles have tightened. Buyers expect clear visibility into every detail—financial statements, contracts, intellectual property, operational processes—while sellers must demonstrate professionalism and compliance from the first interaction.
Traditional methods of sharing information fall short for three primary reasons:
-
Lack of controlled access: Once a document leaves an inbox, control is lost.
-
No centralized record: Tracking who viewed what—and when—is nearly impossible.
-
Fragmented communication: Critical questions and updates often get lost across channels.
A Virtual Due Diligence Room addresses these challenges directly, replacing outdated workflows with transparent, auditable processes.
How a Virtual Due Diligence Room supports full deal visibility
Transparency is more than making documents available—it requires structure, control, and context. Virtual Data Rooms (VDRs) ensure that both sides of the transaction can evaluate the same verified information under a unified framework.
Key features that promote deal transparency include:
-
Structured folder hierarchies: Documents are organized by category—legal, HR, financial, intellectual property—ensuring nothing is misplaced.
-
Controlled access levels: Stakeholders see only the files relevant to their role, reducing noise and preventing exposure.
-
Audit logs: Every action—viewing, downloading, editing—is tracked, enabling compliance and internal oversight.
-
Document versioning: No confusion over outdated drafts or missing updates.
-
Real-time activity monitoring: Sellers can see which documents attract the most buyer attention, helping anticipate questions.
With these capabilities, due diligence evolves from a slow, uncertain process into a clear, well-governed operation.
Enhancing communication and reducing negotiation friction
Confusion in due diligence frequently stems from scattered communication. Email threads, messaging apps, and external tools create gaps in the negotiation timeline. VDRs solve this by embedding communication directly into the reviewing environment.
Modern M&A Virtual Data Rooms offer:
-
Centralized Q&A modules: All questions and answers remain linked to their corresponding documents.
-
Role-based communication flows: Sensitive threads can be restricted to specific advisors or executives.
-
Automated notifications: Buyers and sellers receive alerts about updates, new documents, or resolved questions.
This reduces time-consuming back-and-forth and prevents misunderstandings that can stall negotiations or derail trust.
Why transparency protects both sides during the closing stages
As the deal moves from review to negotiation and finally to closing, transparency becomes even more critical. Both parties must confirm that the information relied upon is complete, accurate, and up to date. A Virtual Due Diligence Room protects this integrity by:
-
Providing a single source of truth, eliminating document scattering.
-
Ensuring consistent updates, so all reviewers see the same data simultaneously.
-
Maintaining a permanent record of all activity for compliance or post-deal disputes.
-
Allowing e-signature integration to execute agreements securely without leaving the platform.
-
Offering access expiration and revocation, critical when transitioning out of negotiation phases.
The platform ensures that nothing is overlooked and that closing documents reflect the most reliable, transparent data available.
Conclusion — transparency is now a measurable competitive advantage
In today’s M&A environment, transparency is not a courtesy—it is a requirement. Virtual Due Diligence Rooms give companies the infrastructure needed to navigate complex evaluations with confidence. By centralizing high-value documents, controlling access, recording every interaction, and enabling structured communication, VDRs create a transparent environment where buyers and sellers engage on equal footing.
Organizations using VDRs report faster deal cycles, fewer disputes, improved compliance outcomes, and stronger trust among stakeholders. As cross-border transactions continue to grow and regulatory demands intensify, the M&A virtual data room stands as a cornerstone of modern dealmaking. Transparency is no longer optional—and with VDR technology, it becomes achievable, measurable, and strategically advantageous.
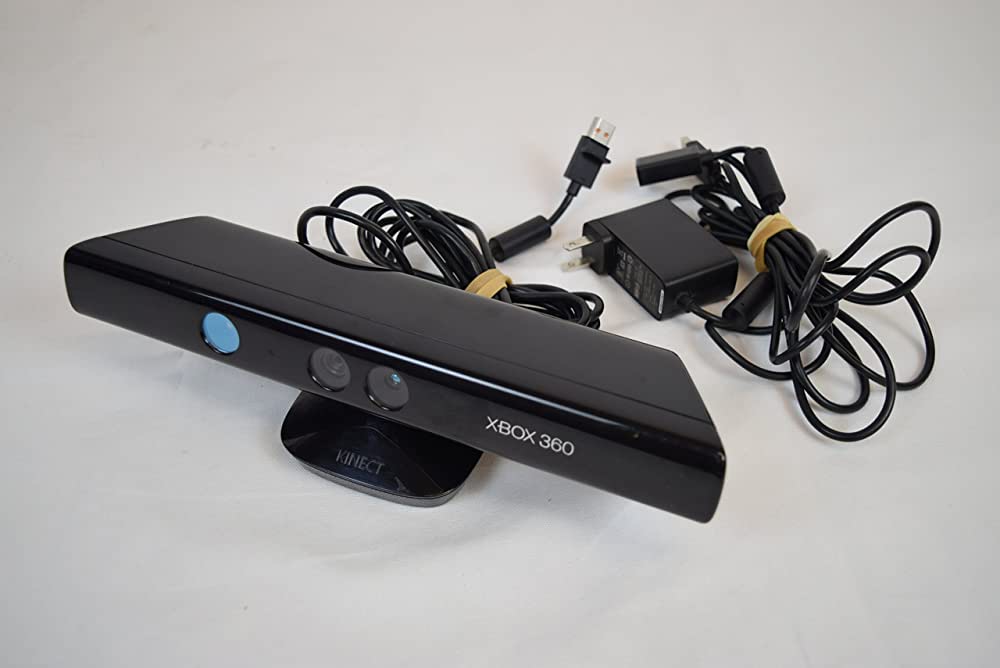
Microsoft’s Kinect technology has revolutionized the world of gaming and motion sensing. Kinect is a motion sensing input device developed by Microsoft for Xbox 360 and Xbox One video game consoles. The technology uses cameras, microphones, and depth sensors to track the movement of the player’s body and interpret it as game controls. There have been several versions of Kinect released over the years, but the most popular ones are Kinect 1414 and Kinect 1473. In this article, we will explore the differences between these two versions of Kinect and the cases of their usage.
Kinect 1414 was the first version of Kinect released in 2010. It was designed to be used with Xbox 360 consoles and used a proprietary connector to connect to the console. It had a horizontal bar-shaped design with a motorized pivot that could be tilted up or down. Kinect 1414 had a VGA resolution camera that could capture video at 640×480 pixels and a depth sensor that could track the position of objects up to 3 meters away.
On the other hand, Kinect 1473 was released in 2013 and was designed to work with Xbox One consoles. Unlike the Kinect 1414, Kinect 1473 uses a standard USB 3.0 connector to connect to the console. It has a sleeker and more compact design, and the motorized pivot has been removed. Kinect 1473 has an improved camera that can capture video at 1080p and a better depth sensor that can track objects up to 4.5 meters away.
The differences between Kinect 1414 and Kinect 1473 are significant, and they affect the cases of their usage. Let’s look at some of the cases where these two versions of Kinect are used.
Gaming
Kinect technology was originally developed for gaming, and it remains one of its primary uses. Kinect 1414 is used with Xbox 360 consoles and is compatible with a wide range of games. However, as the gaming industry evolved, so did the need for better technology. Kinect 1473 was developed to work with Xbox One consoles and is optimized for the latest generation of games. It has a better camera and depth sensor, which allows for more accurate tracking and more immersive gameplay.
Health and Fitness
Kinect technology has also been used in the health and fitness industry. Kinect 1414 has been used in various fitness games that track the player’s movements and provide feedback on their form and posture. Kinect 1473, with its improved camera and depth sensor, has taken health and fitness games to the next level. It can track the player’s movements with greater accuracy, which allows for more precise feedback and coaching.
Education
Kinect technology has also been used in education to enhance the learning experience. Kinect 1414 has been used in educational games that teach children about science, history, and other subjects. Kinect 1473 has been used in similar games, but its improved camera and depth sensor have made the learning experience more immersive and engaging.
Motion Sensing
Apart from gaming, health and fitness, and education, Kinect technology has also been used in motion-sensing applications. Kinect 1414 has been used in various motion-sensing applications such as motion capture, gesture recognition, and robotics. Kinect 1473, with its improved camera and depth sensor, has made these applications more accurate and precise.
In conclusion, Kinect technology has revolutionized the way we interact with games and other applications. Kinect 1414 and Kinect 1473 are two versions of Kinect that have been widely used in various applications. Kinect 1414 was the first version of Kinect released in 2010 and was designed to be used with Xbox 360 consoles. Kinect 1473 was released in 2013 and was designed to work with Xbox One
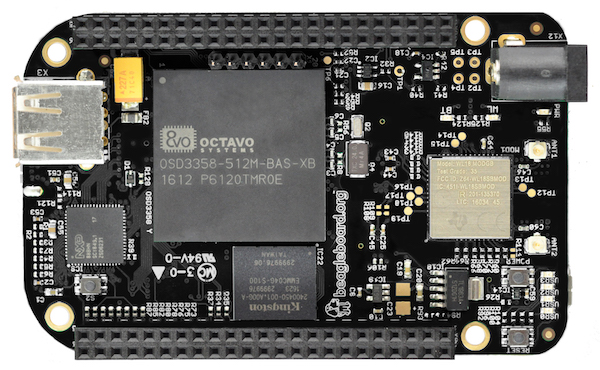
BeagleBone is a popular single-board computer that has gained a significant following among hobbyists, makers, and developers. One of the primary advantages of BeagleBone is its flexibility, which allows it to run different operating systems, including Ubuntu.
Ubuntu is a popular Linux distribution that is renowned for its user-friendly interface, robust security, and broad software library. Installing Ubuntu on BeagleBone can open up a world of possibilities and enable you to run different applications, from web servers and databases to machine learning frameworks and robotics software.
In this article, we’ll walk you through the steps involved in installing Ubuntu on BeagleBone. We’ll assume that you have some basic knowledge of Linux and command-line interfaces, but we’ll try to keep things as simple as possible.
Before we dive into the installation process, let’s go over the prerequisites and the hardware requirements.
Prerequisites:
- A computer with an SD card reader
- A microSD card (4GB or larger)
- A USB to serial adapter (for BeagleBone Black)
- A BeagleBone board (we’ll use BeagleBone Black as an example)
Hardware requirements:
- A BeagleBone Black or BeagleBone Green board
- A microSD card (4GB or larger)
- A USB to serial adapter (for BeagleBone Black)
Once you have these items, you’re ready to begin the installation process. Here are the steps:
Step 1: Download the Ubuntu image
The first step is to download the Ubuntu image that you’ll use to install the operating system on the BeagleBone. You can find the latest Ubuntu image for BeagleBone Black or BeagleBone Green on the official Ubuntu website or the BeagleBone website.
Step 2: Write the image to the microSD card
Once you’ve downloaded the Ubuntu image, the next step is to write it to the microSD card. To do this, you’ll need to use an image writing software such as BalenaEtcher or Rufus.
To write the image, insert the microSD card into your computer’s SD card reader, open the image writing software, select the Ubuntu image, select the microSD card as the target, and click “Flash.” Wait for the software to complete the process, and then eject the microSD card from your computer.
Step 3: Connect the BeagleBone to your computer
Before you can install Ubuntu on BeagleBone, you need to connect the board to your computer. You’ll need to use a USB to serial adapter to connect BeagleBone Black to your computer. Connect the adapter to your computer’s USB port and connect the serial cable to the BeagleBone’s serial port.
Step 4: Power up the BeagleBone
With the USB to serial adapter connected, you can now power up the BeagleBone by connecting it to a power source or USB port on your computer. Wait for the BeagleBone to boot up, and then open a serial terminal program such as PuTTY or minicom on your computer.
Step 5: Configure the BeagleBone
Once you’ve opened the serial terminal program, you’ll need to configure the BeagleBone by setting the boot mode to “microSD.” To do this, enter the following commands:
For BeagleBone Black:
U-Boot# setenv bootargs console=ttyO0,115200n8 root=/dev/mmcblk0p1 ro rootfstype=ext4 rootwait fixrtc
U-Boot# setenv bootcmd 'fatload mmc 0:1 0x82000000 uImage; fatload mmc 0:1 0x88000000 am335x-boneblack.dtb; bootm 0x82000000 - 0